
This blog has seen five games set in Northern France in 1513 so far. Todays post covers a game I tried out using Lion Rampant and set during the War for Naples 1499-1504. As you may know, I have rambled on about it a few times, this is a part of the Italian Wars that really interests me. I was keen to get my forces on the table in an attempt to fight out a skirmish using my early 16th century French and Spanish.
The setting for this game is the Kingdom of Naples, 1502. Following the French King Charles VIII's seizure of Naples at the start of 1495 the Spanish soon came to the aid of the Neapolitan King, Ferdinand II, and under the leadership of Gonzalo de Cordoba successfully reduced the French hold over the Kingdom. The Spanish support for the Kingdom was short lived however, as Ferdinand of Aragon and Charles VIII's successor Louis XII of France, who had ambitions to hold Milan and was afraid of an attack from Spain, signed the Treaty of Granada at the end of 1500. France and Spain agreed to divide Southern Italy between themselves after removing the last Trastamara King, Ferdinand II's successor, Frederick, from the throne of Naples. This was confirmed by the Borgia Pope Alexander VI, father of Cesare Borgia, in 1501.
The armies of France and Spain invaded Naples in the summer of 1501. There were soon arguments between them over the division of Southern Italy. This led to war, with the French being stronger in numbers. The Spanish under Gonzalo de Cordoba had learnt from their previous Italian encounters with the French and fought a war of raid and ambush against them while they strengthened their forces. It was not until he had tested the French with skirmishes and raids that de Cordoba marched out of Barletta, now with 2,000 Landsknechts sent by Maximilian I, and defeated the French at Cerignola in the spring of 1503, later winning the war at Garigliano in December 1503.
This raid is set during 1502 when the Spanish were fighting the French with hit and run tactics. The redoubtable Bayard is captaining the French against a Spanish raiding party, under Alonso de Sotomayor. Sotomayor was the Spanish Knight later killed by Bayard in a duel so I thought it would be interesting to have him as the character leading an earlier raid on the French. The scenario is set somewhere in Southern Italy. A Spanish force is about to strike a village held by a small French Garrison. The larger local French Garrison has been alerted to this raid and heads out in strength to try and stop the Spanish before they loot and burn the village.
The game was played using Lion Rampant with some army lists I put together for the Spanish and French forces using parts from the armies in the Tudor games with quite a few new units such as Swiss Pike, Spanish Jinetes and Rodeleros added. As before I used bigger units but still with 6 or 12 points of damage respectively and had to ignore the 3" rule between units. The scenario was "Sausages without Mustard" with the Spanish having to burn the four objectives in the centre of the board: the barn doors, two hay carts and the small field. The French had to reach the village and try and stop them. The photos are of the actual game and not staged. Apologies for any bad lighting.
 |
| The Spanish raiding force with a small force of Aventuriers "guarding" the village. The four "Sausages without Mustard" objectives - the barn doors, small field and two hay wagons are shown. |
 |
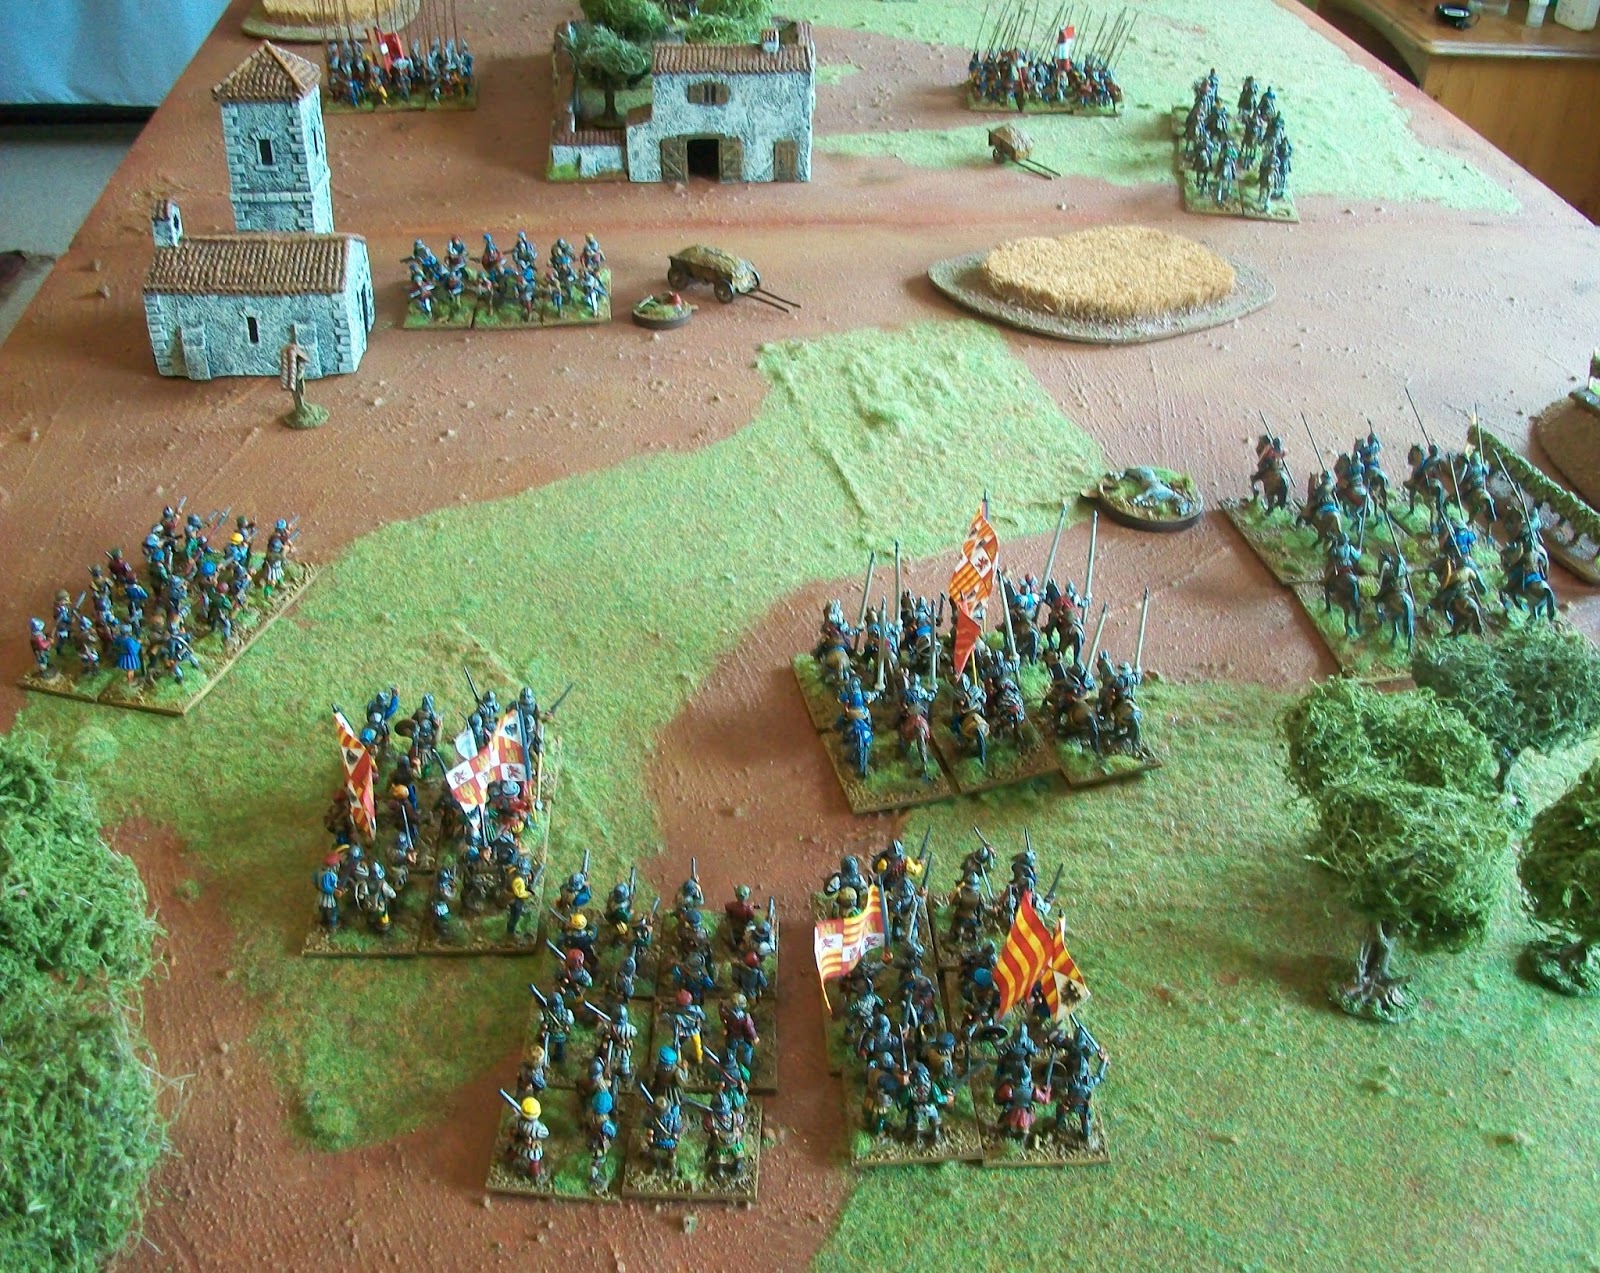
| The local French garrison arriving to chase off the raiders. From left to right: Italian Mounted Crossbowmen, Swiss Mercenary Pike, Aventuriers, French Ordonnance "Archers" with lances, Bayard and his Men-at-Arms, Swiss Mercenary Pike and, to the right not in the picture, Italian Men-at-Arms. |
The forces are shown above and were as follows:
The Spanish
Alonso de Sotomayor and his Men-at-Arms
2 Units of Rodeleros - Sword and Bucklermen
2 Units of Arquebusiers
2 Units of Jinetes
This force is meant to represent the Spanish raiders sent out for an attack on the village.
The French
The troops billeted in the village:
1 Unit of Aventurier Crossbowmen
The local garrison:
Pierre Terrail, seigneur de Bayard and a unit of French Men-at-Arms
1 Unit of Ordonnance Archers with Lances
2 Units of Swiss Pikemen
1 Unit of Aventurier Crossbowmen
1 Unit of Italian Men-at-Arms
1 Unit of Italian Mounted Crossbowmen
This force represents the local French who have been billeted in the village and the local garrison who are riding to their aid. A mix of French, Swiss and Italians all in the pay of Louis XII.
 |
| The Spanish advance towards the village. |
 |
| The local French garrison, alerted of the raiders, attempt to stop them. |
The best way to follow the action is the captions under the following photos. The game started with the Spanish Jinetes heading for the objectives. Initially the Jinetes were successful, one unit managed to set fire to the small field, meaning the Spanish had taken one objective, while the other unit harassed the Aventuriers with javelins and caused casualties. The tide turned for the skirmishing horse as the Aventuriers shot back and sent one unit reeling while the arrival of the Italian Mounted Crossbowmen saw off the other Jinetes.
As the retreating Jinetes infront of the Aventuriers fled the field the Spanish Arquebusiers who were following up behind them also came under the withering rain of crossbow bolts from the Aventuriers. As with the Jinetes the Arquebusiers broke into a rout. The Jinetes who had lit the field also fled under attack by the Mounted Crossbowmen. The Spanish now had no light cavalry left.
 |
| The Spanish Jinetes initially prove dangerous. The Aventuriers in the village suffer from their javelins. To the right some Jinetes dismount and attempt to set fire to the field. |
 |
| The Aventuriers strike back with their crossbows and manage to inflict casualties on the Jinetes attacking them. The send them back "battered". To the right the other Jinetes set fire to the field - achieving one objective for the Spanish. |
 |
| The Jinetes on the left have routed while the others on the right are sent back by an attack from the Italian Mounted Crossbowmen in French service. |
 |
| The Spanish force - one unit of Jinetes has routed. The Arquebusiers in the top of the photo are getting dangerously near to the Aventuriers. |
 |
| With all their Jinetes having now fled the Spanish under Alonso de Sotomayor press on with their attack - they still have three objectives to destroy. |
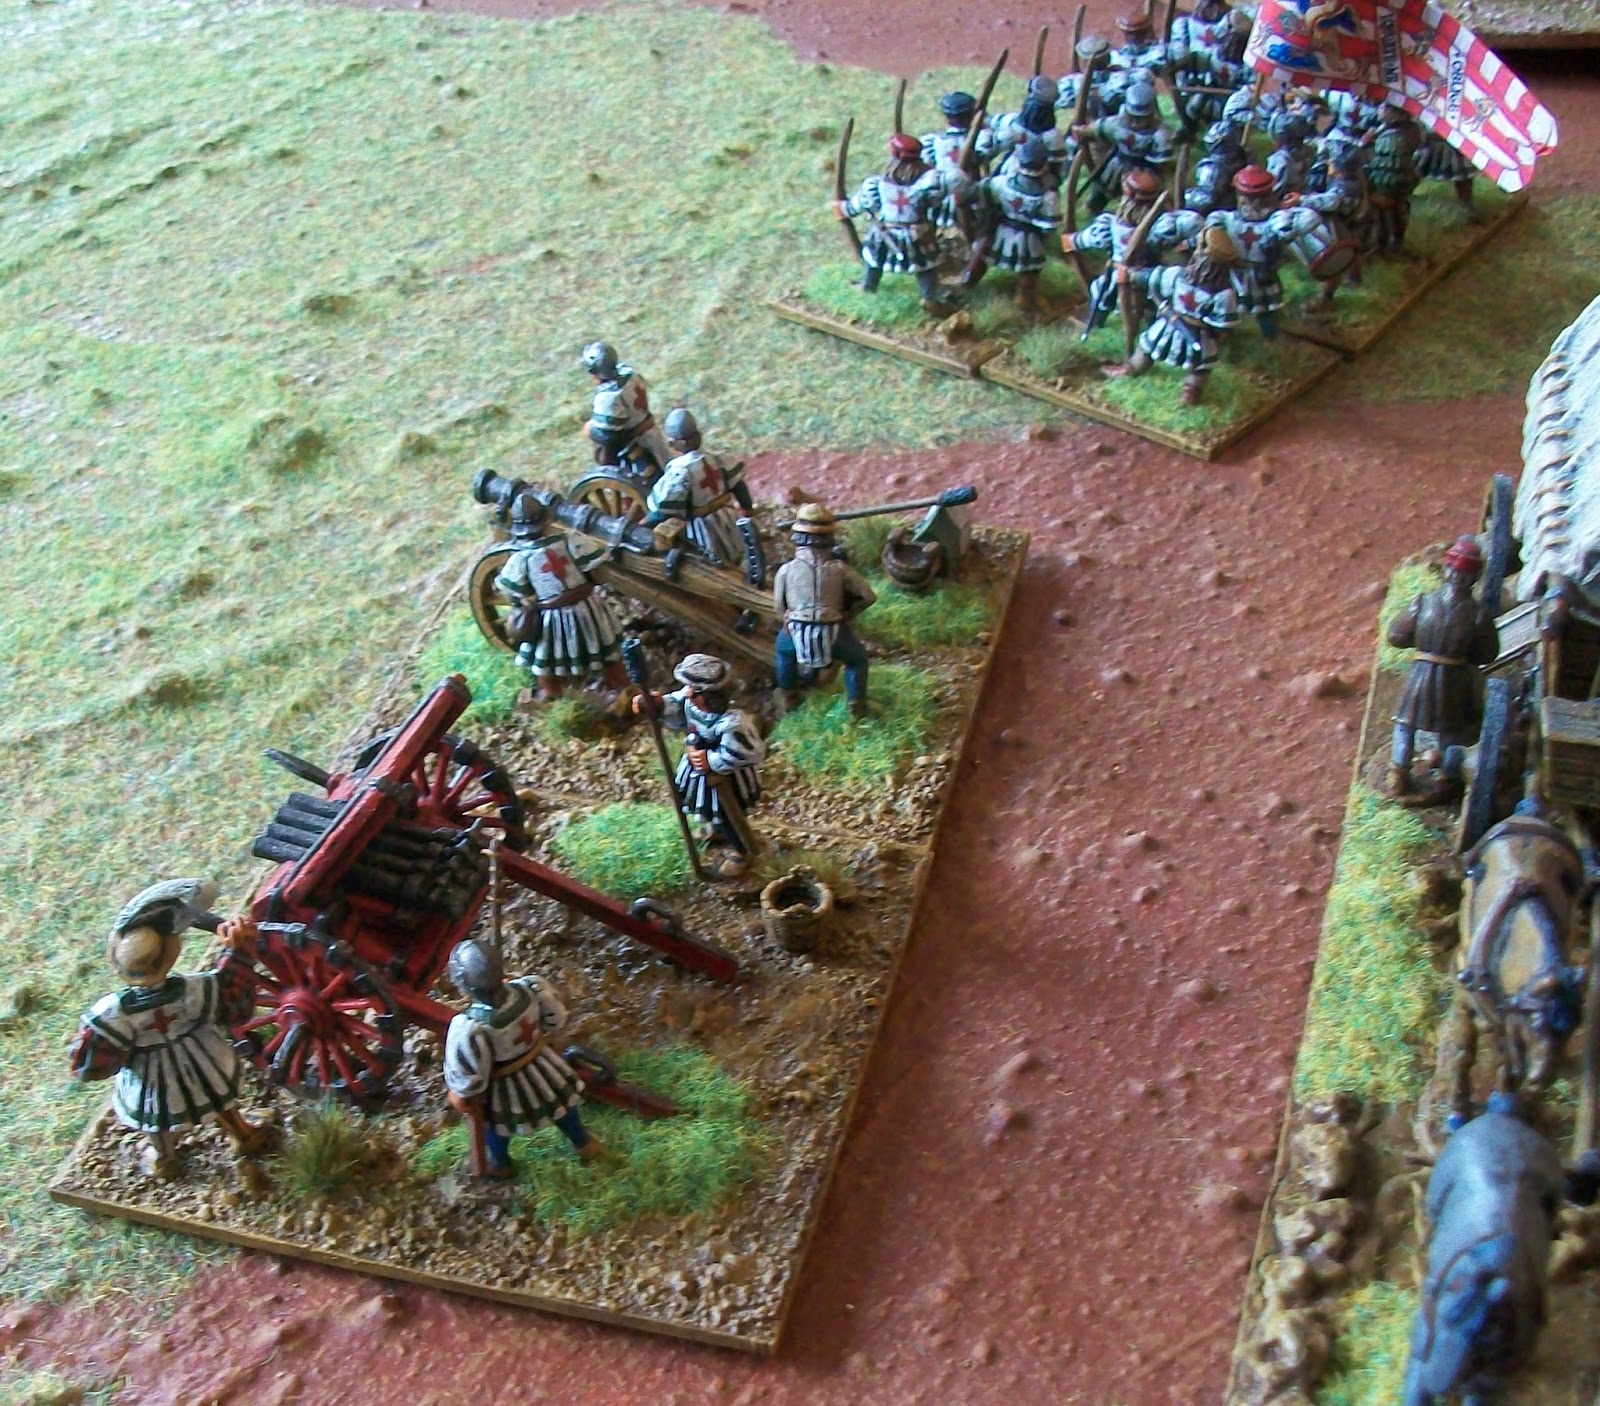
As the Spanish Men-at-Arms under Alonso de Sotomayor arrived they caught the Italian Mounted Crossbowmen off guard and sent them back with a vicious charge. The Swiss from the main French Garrison arrived in the village only to be immediately charged by the Spanish Men-at-Arms. The unfortunate Swiss were driven back by the Spanish heavy cavalry and as they gave ground they were exposed to a devastating close range volley of shot by the second unit of Spanish Arquebusiers. This effectively removed them from the game as a fighting unit. At the same time the heroic French Aventuriers were charged by one of the units of Spanish Rodeleros. The Aventuriers were finally broken having put up a valiant defence of the village they were billeted in. They put up enough of a fight to leave the Spanish swordsmen "battered" after their clash with them.
 |
| By the village church the Aventuriers manage to rout one unit of advancing Spanish Arquebusiers. Sotomayor's Men-At-Arms launch an attack on the Mounted Crossbowmen and send them back. |
 |
| With the Aventuriers still resolutely holding the village, they've routed two units so far, the disciplined Swiss Mercenaries move in to support them. |
 |
| The Swiss advance towards the Spanish raiders while the Aventuriers cause casualties to the Rodeleros who are advancing on them. |
 |
| The Spanish Men-at-Arms charge into the first group of Swiss from the French garrison and push them back into the line of sight of the Spanish Arquebusiers... |
 |
| ...the Arquebusiers open fire on the first group of Swiss and effectively destroy them in a devastating hail of shot. |
 |
| Having made a heroic defence of the village so far the Aventuriers are charged by the Spanish swordsmen and finally overcome. They put up enough of a fight to leave the Rolederos "battered" by the encounter! |
The second group of Swiss mercenaries arrived in the village and launched a furious assault on the other Spanish Rodeleros. They attacked them so fiercely that that the Spanish had no time to countercharge. As this fighting took place the Spanish Men-at-Arms charged Bayard and his French Men-at-Arms. Bayard spurred his men into a countercharge and a fierce melee ensued. Both groups of Men-at-Arms backed off from the fight but the Spanish were definitely in worse shape having already broken their lances on the Swiss in an earlier charge. The remaining Swiss held firm in the face of a volley of shot only to then be charged by the Spanish Rodeleros who clashed with them for a second time. Both sides took losses but a combination of two clashes with the Spanish swordsmen and a nasty volley of shot meant that this second unit of Swiss also faltered and fled.
 |
| The Swiss send the Rodeleros back, at the same time Sotomayor and his Men-at-Arms charge at Bayard. He counter charges with his Men-at-Arms and a fierce clash ensues. |
 |
| Both groups of Men-at-Arms take casualties in this melee, but Sotomayor and his men come off worse having already broken their lances clashing with the Swiss and having been harassed by the Italian Mounted Crossbowmen. |
 |
| The remaining Swiss are subjected to a damaging volley of shot but stand firm. The Rodeleros clash with them again and both sides take losses. The Swiss finally break. The Spanish Arquebusiers have played a big part in both groups of Swiss being defeated. |
The Fench Garrison may of lost their Swiss mercenaries but this sacrifice seemed to be enough to have persuaded the Spanish raiders that burning the village was a bad idea. The Spanish began a retreat having lost enough of their force to send them back. The French had defended the village at the cost of the elite infantry in their garrison. It had also not gone unnoticed that the Italian Men-at-Arms they had hired had not got anywhere near the fighting.
This was a fun game, and at times seemed quite close, however setting fire to all those objectives in the face of the French turned out to be too great a task for the Spanish. It was great to test out the Swiss Pike, Spanish Jinetes and Spanish Arquebusiers and to get some Italian Wars armies on the field. I still think my Italian Wars Lion Rampant Lists may need a bit of tweaking but that is part of the enjoyment.
 |
| Even with the loss of their Swiss Mercenaries as the rest of the French garrison arrive they are clearly still an effective fighting force. |
 |
| The Spanish, however, have suffered badly in the fighting and start to withdraw having only destroyed one of their four objectives - the corn field. |
 |
| The Italian Men-at-Arms in the French Garrison had wisely managed to avoid any conflict whatsoever during the clash. |